Tuesday, 28 April 2015

Connect and consume data with Oracle RightNowCX using the new SOA12c RightNow adapter


The  Oracle RightNow adapter has been released for the SOA 12.1.3 just couple of months ago, and I tested as soon as I've heard of it!

What it is needed for this tip

  • JDeveloper 12.1.3
  • An account with read right on the WebServices exposed by an Oracle Rightnow instance

Before starting!

Make sure the following patch bundle has been applied to your SOA/jdev Home.

Bundle Patch for Bug: 20423408

The patch can be downloaded from Oracle support of course, and installed using opatch apply.
The patch must be applied to both, the SOA Server home (if not in the jdev home) and Jdev home, since the new plugin which will shows the RightNow adapter wizard, must be configured into JDeveloper.
Remember to perform the post-installation steps (patch READ-ME for details):


1. Log in to Fusion Middleware Control Enterprise Manager.
2. Expand "Weblogic Domain" in the left panel
3. Right click on the domain you want to modify and select Security > System Policies to display the page System Policies.
4. In the System Policies page, expand "Search". For "Type" select "Codebase", for "Includes" enter "jca" and click the arrow button.
5. Select "jca-binding-api.jar" in the search returned result and click "Edit".
6. In the "Edit System Grant" page, click on "Add".
7. In the "Add Permission" page, click on "Select here to enter details for a new permission" and enter the following:
  • Permission Class:oracle.security.jps.service.credstore.CredentialAccessPermission
  • Resource Name: context=SYSTEM,mapName=SOA,keyName=*
  • Permission Action: *
8. Click on "OK" to save the new permission.


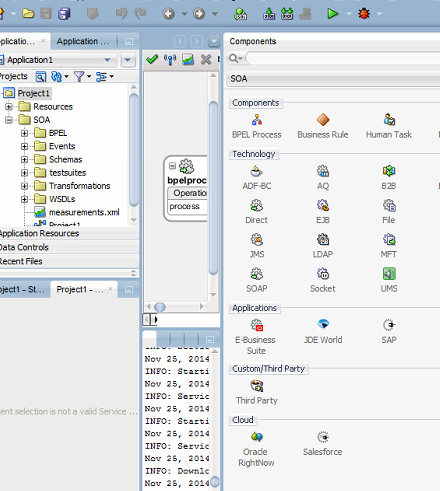
In order to verify the installation went well please double check you'got the RightNow Adapter in the Cloud Adapter Component palette:


After the installation start JDeveloper with the option "jdev.exe -clean"

Hands on!

  • Generate one SOA application with an empty SOA project.
  • Drag and drop an Oracle Rightnow component in the External reference lane and the wizard will pop up
  • Insert the WSDL url (the WSDL and XSD schemas will be downloaded), also create a new csf key in Jdeveloper with your username and password for Oracle Rightnow. 


  • Select the Create WSDL operation and the Contact business object


  • Click FINISH
  • Now add a WIRE from the BPEL process to the Rightnow adapter
  • Edit the composite input XSD adding the following fields:
<element name="process">
<complexType>
<sequence>
<element name="Name" type="string"/>
<element name="LastName" type="string"/>
<element name="Address" type="string"/>
<element name="PostCode" type="string"/>
</sequence>
</complexType>
</element> 

  • Open the BPEL process and add an invoke to the adapter (create input and output variables)
  • Add a transformation which will be used to set properly the invoke input variable for the Rightnow adapter.
  • Edit the transformation as showed below. The left variable is the composite input variable, while the right one is the Rightnow input one 

  • So the BPEL process will look like this below
  • Deploy it top the integrated SOA Server
  • Last step, configure the username and password in the EM console using the CSF key MyRightNowUser configured in the JCA adapter in WeblogicDomain => Security => Credentials in the Credential Map SOA, as showed below


The SOA Composite can now be tested and hopefully an account will be created in Oracle Rightnow SC!
Let me know for any issue (see Possible problems below)!

Tip: instead of configuring the credentials in the SOA-EM, the csfkey property parameter in the jca-properties definition can be omitted and replaced with username and password parameters

Possible problems

  • In case the WebService invocation fails with this:
"Exception occurred during invocation of JCA binding: "JCA Binding execute of Reference operation 'Create' failed due to: Unable to create Cloud Operation:
The invoked JCA adapter raised a resource exception.
Please examine the above error message carefully to determine a resolution "

Then replace in the Rightnow JCA the targetWSDLURL local WSDL with the remote one, as explained here and redeploy it!


  • In case the WebService invocation fails with this:
"Exception occurred during invocation of JCA binding: "JCA Binding execute of Reference operation 'Create' failed due to: Client received SOAP Fault from server : Username is not specified in UsernameToken."

Then the credential key is not configured correctly in the credential store or the process can't see it. Review it!


  • In case the WebService invocation fails with this:
"Exception occurred during invocation of JCA binding: "JCA Binding execute of Reference operation 'Create' failed due to: Client received SOAP Fault from server : Access Denied."

Then the user-password are not correct in the credential key. Review it!


Please find the RightNow Cloud Service Adapter documentation here!
The source code of the composite created here

Wednesday, 22 April 2015

Endeca Guided Search Installation and Deployments

Endeca Guided Search - Pre-requisites

In order to setup Oracle Endeca Commerce on RHL the following requirements are needed:
  • An oracle user
  • A folder, owned by the oracle user, for the product binaries, possibly in the file-system root (in this how-to we are assuming that the main installation folder is set to /u01/oracle).
  • A static ip-address and the hostname mapped in the /etc/hosts file.
Is also necessary download the installation packages from the oracle edelivery cloud for the Linux operating system. The packages to download are:
  • Oracle Endeca MDEX engine.
  • Oracle Endeca PlatformServices.
  • Oracle Endeca Content Acquisition System.
  • Oracle Endeca ToolsAndFrameworks.
Here the OS requirement:
  • DOS2UNIX package has to be installed if not: yum install dos2unix 

Endeca Guided Search - Server Installation

Step 1 - Install the Oracle Endeca MDEX engine

Unzip the Oracle Endeca MDEX package and run the follow command (replace the ? with the version of the file in use):
chmod +x mdex?????.sh
./mdex???????.sh --target /u01/oracle
At the end of the process instead running the script as suggested open it and copy and paste the variables declaration into the .bash_profile file then reload the profile. Run the follow command to check that the MDEX root folder has been set in the environment
echo $ENDECA_MDEX_ROOT
Create an apps folder under the main Endeca installation folder.

Step 2 - Install the Oracle Endeca PlatformServices

Unzip the Oracle Endeca PlatformServices package and run the follow command (replace the ? with the version of the file in use):
chmod +x platformservices?????.sh
./platformservices?????.sh --target /u01/oracle
During the setup process provide:
  • The Endeca HTTP service port, by default is set to 8888 (use this port if not already binded by other processes).
  • The Endeca HTTP shutdown service port, by default is set to 8090 (use this port if not already binded by other processes).
  • The Endeca Control System JCD port , by default is set to 8088 (use this port if not already binded by other processes).
  • Type Y to install the EAC agent.
  • The MDEX full path included with the version number (ie. /u01/oracle/endeca/MDEX/6.5.0)
  • Type Y to install reference implementations.
At the end of the process, as for the MDEX engine, instead running the script as suggested open it and copy and paste the variables declaration into the .bash_profile file then reload the profile. Run the follow command to check that the ENDECA_ROOT has been set in the environment
echo $ENDECA_ROOT

Step 3 - Install the Oracle Endeca Tools And Framework

Unzip the Oracle Endeca Tools and Frameworks package and run the runInstaller.sh file located under the install sub-directory in the Disk1 folder. Then follow the steps below:
  1. Click Next on the welcome page
  2. Accept the licence agreement
  3. Specify inventory directory and credential and click Next
  4. Specify installation type, for development machine install the Full version as it contains reference
  5. application, then click Next
  6. Specify home details and click Next
  7. Provide administrator password for Workbench console and click Next
  8. Review installation options and click on Install
  9. Run the inventory script as root before closing the window
  10. Click on Exit
At the end of the process installation process is necessary, in order to proceeed with the Content Acquisition System setup, define in the bash_profile the following two variables (path could change) and reload the profile:
ENDECA_TOOLS_ROOT=/u01/oracle/endeca/ToolsAndFramework/11.0.0
export ENDECA_TOOLS_ROOT
ENDECA_TOOLS_CONF=/u01/oracle/endeca/ToolsAndFramework/11.0.0/server/workspace
export ENDECA_TOOLS_CONF

Step 4 - Install the Oracle Endeca Content Acquisition System

Unzip the Oracle Endeca Content Acquisition System package and run the follow command (replace the ? with the version of the file in use):
chmod +x cas?????.sh
./cas?????.sh --target /u01/oracle
During the setup process provide:
  • The Endeca CAS service port, by default is set to 8500(use this port if not already binded by other processes).
  • The Endeca CAS shutdown service port, by default is set to 8506(use this port if not already binded by other processes).
  • The ENDECA_TOOLS_ROOT and ENDECA_TOOLS_CONF should already been defined in the system and the Content Acquisition System will retrieve this information from the user profile so this step will be skipped by default.
  • Provide the hostname of the machine on which CAS is installed

Step 5 - Validating the Oracle Endeca Commerce setup

In order to validate the setup start the Endeca services as follow:
  • Start PlatformServices using the startup.sh script in /u01/oracle/endeca/PlatformServices/11.0.0/tools/server/bin
  • Start the Content Acquisition System using the cas-service.sh script in /u01/oracle/endeca/CAS/11.0.0/bin (better start this service in background using the command nohup ./cas-service.sh &)
  • Start the Workbench using the startup.sh script in /u01/oracle/endeca/ToolsAndFrameworks/11.0.0/server/bin
  • Connect to the Workbench console available at http://<host>:8006 and check that in the console page a Data
  • Control section appears (to confirm that the CAS has been successfully installed, also if this console is accessible then the CAS is running on the host).

Step 6 - Try to deploy the reference application

To deploy the reference application run the deployment template pointing the discovery reference application.
Follow this step:
Access to the deployment template folder under ToolsAndFrameworks (ie. /u01/oracle/endeca/ToolsAndFrameworks/11.0.0/deployment_template/bin)
  • Run the deployment command ./deploy.sh --app /u01/oracle/endeca/ToolsAndFrameworks/11.0.0/reference/discover-data-catalogintegration/deploy.xml
  • Press Return
  • Digit Y and press Return
  • Provide an application name (ie. test)
  • Provide the deployment directory (/u01/oracle/endeca/apps)
  • provide the EAC port (by default is 8888)
  • Provide the CAS installation folder (ie. /u01/oracle/endeca/CAS/11.0.0)
  • Provide teh CAS version (ie. 11.0.0)
  • Provide the hostname where CAS is running
  • Provide the CAS port (byd efault is 8500)
  • Provide the default language (by edfault is english)
  • Provide the Workbench port (by default is 8006)
  • Provide the port that the catalogue should use for the DGraph process (if not already used accept the default value 15000)
  • Provide the port that the catalogue should use for the Authoring DGraph process (if not already used accept the default value 15002)
  • Provide the port that the catalogue should use for the Log server process (if not already used accept the default value 15010)
  • Press return
  • Press return
To start the reference application follow this steps:
  • Access to the control folder located under the main application catalogue folder.
  • Run the ./initialize_services.sh script
  • Run the script ./load_baseline_test_data.sh
  • Run the script ./baseline_update.sh
  • Run the script ./promote_content.sh
  • Access to the reference application (http://<host>:8006/endeca_jspref) provide as host localhost and as port the DGraph port provided during the application deployment phase (in this case 15000) and check that the data has been succesfully loaded

Optional: Assembler service application Deployment

  1. Copy the folder  ENDECA SERVER/ToolsAndFrameworks/3.1.2/reference/discover-service into a folder with a different name (for instance new-discover-service) within the same folder (so you'll have  ENDECA SERVER/ToolsAndFrameworks/3.1.2/reference/new-discover-service).
  2. Edit the ENDECA SERVER /ToolsAndFrameworks/3.1.2/reference/new-discover-service/WEB-INF/assembler.properties with the correct port and host of the application previously deployed (Step 6).
  3. Copy the file ENDECA_SERVER/ToolsAndFrameworks/3.1.2/server/workspace/conf/Standalone/localhost/discover.xml into a file with a different name (for instance new-discover-service.xml), customize it with the path of the application created at point 1 (ENDECA SERVER/ToolsAndFrameworks/3.1.2/reference/new-discover-service), and copy the file into the same folder (so you'll have ENDECA_SERVER/ToolsAndFrameworks/3.1.2/server/workspace/conf/Standalone/localhost/new-discover-service.xml).
  4. Access to the Assembler application just deployed via REST interface using this url (update host and port if you need): http://54.228.239.224:8006/new-discover-service/json/services/guidedsearch?Ntt=<SearchKeyword>


Please let me know for any issues!!!

Saturday, 22 November 2014

SOA11 and Coherence integration case study

In one of the project where I've worked on, the customer was facing issues due to the many web services calls triggered by their portal. Basically the Service Bus was crashing since it was reaching its limit in terms of web services transactions supported.

The initial architecture


The logged in users in Web Center portal were triggering calls trough the ADF framework to the OSB, and those calls were validated and enriched and then routed to the target third party services. All those operation were synchronous.

The analysis

We decided to take a deeper look to understand which services were being called, how many times and with which frequency, etc.
The tool we used here, was the Statistics in the OSB. We enabled them on all the Web Services, we run the Portal, and played with the functionality, which were calling the WS under analysis.

After 10 minutes we got the following result, where we noted 2 main things:

  1. There were some WS operations called very frequently (1 each 20 msecs for each logged users) like GetTask and GetCurrentState, while all the others were being called only few times.
  2.  The WS calls were getting information only for the specified WC Portal user which was triggering theggering thise calls.


The Solution

We spoke with the developers of the third party WS, proposing them to move to a "bundle" approach. Basically we asked them to expose two more operations, GetBundleTask and GetBundleState, which respectively were like GetTask and GetCurrentState, but with a list of usersId/taskId in input.
We configured a new Coherence server, thinking about using an asynchronous approach and the caching of the data. The architecture now looks like this:


Benefits:
  • The WebCenter/ADF layer did not need any modification since we did not touch the OSB WS interfaces.
  • The SOA Async process was getting data in bundle for all the Users logged in in one call (or very few) with much better results.
  • The services exposed on the OSB were getting the data 99% of the time from the local cache, so the network latency was now almost zero and the average response time was 30 times less.


Here are the new statistics after applying those changes. The number of calls to getTask and getCurrent state external WebServices from the OSB were dropped of the 99%, all the data were coming from the cache.


Here the Async BPEL service was facing the same latency calling the bundle services then the singe OSB services, but at least this time we were calling them with a list of users.

Here are some sequence diagram which explains now the sequence of the operations. The OSB Service now try to get the data from Coherence, if it is  not found it get the same from the OLD external services, and "subscribe" the users for update.

The SOA Business service was calling the external bundle services based on the "subscribed" users list.  


Thursday, 13 November 2014

SOA Testing in Maven

Currently there are few tools that can support testing SOAP interfaces.

For instance Jmeter and SoapUI are suited for testing soap interfaces.

  • SoapUI is explicitly created for testing SOAP interfaces
  • Jmeter has a SOAP support since version 2.3.x. 


SoapUI, has an intuitive user interface and is flexible.
You can run SoapUI stand alone and it can be to integrated within an automated process.

Below you will find instructions for running SoapUI as a part of a maven build. This makes it possible to run your automated SOAP tests in Maven with a build process like Jenkins. Combined with automatic deployment it is possible to support an agile software development process that supports frequent delivery of versions and continuous integration and testing.

Maven2 supports SoapUI with the Maven SoapUI plugin.

Usage:

Add the eviware plugin repository to your repository list.

 
<pluginRepositories>
  <pluginRepository>
    <id>eviwarePluginRepository</id>
    <url>http://www.eviware.com/repository/maven2/</url>
  </pluginRepository>
</pluginRepositories>


Attach to verify phase

By attaching the SoapUI maven plugin to the verify phase your build process runs it automatically in the integration-test phase. The “iso-soapui-project.xml” is the reference to the SoapUI xml file.

 
<plugin>
  <groupId>eviware</groupId>
  <artifactId>maven-soapui-plugin</artifactId>
  <version>2.0.2</version>
  <executions>
    <execution>
      <phase>verify</phase>
      <id>soapui-tests</id>
      <configuration>
        <projectFile>${basedir}/src/test/soapui/iso-soapui-project.xml</projectFile>
        <outputFolder>${basedir}/target/soapui</outputFolder>
        <junitReport>true</junitReport>
        <exportwAll>true</exportwAll>
        <printReport>false</printReport>
      </configuration>
      <goals>
        <goal>test</goal>
      </goals>
    </execution>
  </executions>
</plugin>


Convert log to a report

The log export of SoapUI can be interpreted like a normal Surefire unit report. By just adding this part to your maven reports section you can generate a nice overview of your test results.

 
<reporting>
  <plugins>
    <plugin>
      <groupId>org.apache.maven.plugins</groupId>
      <artifactId>maven-surefire-report-plugin</artifactId>
      <configuration>
         <outputDirectory>target/site/soapui</outputDirectory>
         <reportsDirectories>
           <reportsDirectories>target/soapui/</reportsDirectories>
         </reportsDirectories>
      </configuration>
    </plugin>
  </plugins>
</reporting>


Thanks to the AMIS blog for this information!!!

Oracle Code Compliance Inspector


The Code Compliance Inspector uses a pre-defined set of assertions that are based on SOA AIA Integration Developer guidelines and the Web Services Interoperability Organization Basic Profile (WS-I BP) to check SOA projects for design consistency and good coding and documentation practices. CCI qualifies code as Compliant, Conformant, or Fully Conformant to be in sync The Open Group Architecture Framework (TOGAF) standard guidelines based on the pass criteria of the highest priority assertions.


  • CCI is available as a JDeveloper extension
  • As a command-line utility
  • Oracle Enterprise Repository (OER) utility


Developers will typically use the JDeveloper extension and will continuously check compliance on JDeveloper projects as they develop.

The CCI command line utility can be used to incorporate CCI code check as part of our build/deployment/continuous integration process. So every time someone checks code into main branch, the Continuous Integration tool can automatically checkout the code, do a CCI code compliance test and then build and deploy. Of course if the code is not compliant it can send an error notification to a distribution list, without deploying.
Here are some examples for invoking the Code Compliance Inspector from a command line:

  • Windows: checkCompliance.bat -inputDir D:\AIA\demo -outputDir D:\ComplianceOut
  • Linux: sh checkCompliance.sh -inputDir /AIA/demo -outputDir /ComplianceOut


CCI provides optional integration to Oracle Enterprise Repository (OER). When OER is present, CCI can synchronize results to the repository, enabling users to access the report from the OER console. Integrating compliance data into OER provides repository users with information about whether composites are compliant into the repository reports and individual asset metadata.

To make it working in JDEV11 is quite easy, just download and install the extensions in JDeveloper


Then right-click the project and select Check Code Compliance.


Note: when the project is selected, the code compliance inspector can also be launched
from the toolbar.

A highlighted Compliance Results tab will appear in the log panel, go ahead and select it
to see the project status


In this environment, we are simply checking compliance against WS-I standards, but there are also other standards delivered with Oracle Application Integration Architecture Foundation Pack that can check much more as well as additional checks that can be added by your team

Wednesday, 29 October 2014

Oracle SOA 12c Templates


SOA Composite Templates

One of the best new feature in this SOA 12.1.3 release is this about the Template.
The SOA template can really increase the productivity of the Developers team and Oracle is right saying this..
Here I just want to recap the different type of template and main features, across  SOA and OSB, hope this might help.

SOA ‘Starter’ Templates

  • ‘Starter’ Template is a re-usable part of a SOA project
  • Fully editable
  • Store in MDS
  • Three types:
    • SOA Project Template
    • Component Template
    • Custom Activity Template


  • Project template accessible at the time of new project creation
  • Automatically discover in the component palette
    • Component Template
    • Custom Activity Template
  • Share and re-use from MDS


BPEL Sub-processes: standalone and inline

Very useful for groups of activities that are reused within one (inline) BPEL process or the whole Composite (standalone).
  • Allows business logic to be modularized and reused
  • Permits access of data in parent process
  • Improves performance and manageability
  • Compensation and fault handling inherited from calling process
  • Faster rendering as only the entity in question is rendered
The main difference between Standalone and Inline sub processes is that the firsts are visible within the Composite the seconds only within the Bpel Process in which it's been generated.


Service Bus Templates


Pipeline ‘Inherited’ Templates
  • New artifact type.
  • Two ways to create a Template
    • Generate template from existing pipeline
    • Create template from scratch.
  • New pipelines are generated from the Template.
  • Derived pipelines are considered concrete
    • Concrete pipelines can be linked (default) or unlinked
    • If linked, all changes in Template are reflected in derived concretes
  • Templates actions can be ‘Locked’

  • Placeholders in Pipeline template to define where modifications may be placed

Share artifacts within and across applications

SOA Design-Time MDS Repository
  • Wizard to share design time artifacts such as WSDLs and Schemas
  • Moves the artifacts and its dependencies to Design-Time MDS (viz. schema with WSDL)
  • Updates all the references to the transferred artifacts with MDS URLs on transfer


Monday, 16 June 2014

Mocking your services

Almost all the developers which are using developing WebServices are well aware about SOAP UI, however I've always used only to send manual messages to some WebServices for manual testing.

SOAP UI much more than that and not even a licensed version is needed for this. A free one is enough.

Mocking your services is very important if you want to test your own services but you want to do it in isolation, basically without any of the external services (used by your own service to test) to cause of a less determined behavior. Another reason might be because you might want to execute performance test on your services and none of the external has to slow down the test itself.

Step by Step process:

  • Let's suppose you've got a service already available, if you don't have it just create a new simple one and deploy it somewhere.

The service in the following example accepts a String parameter which will be used for the mocking response, in your service you can add a String parameters or later you an use a similar approach with a different parameter type.


  • Create in Soap UI a new project and add the WSDL of the service. Here is my service which I am going to mock.


  • Right click at the port type in SOA UI of the imported WSDL and "Generate MockService". Port and Path can be customized. Select at least the operation you are going to mock.
  • As I did, create as many response as you need to verify your business rules. For instance

Some variable might be used in the response as showed below. SOAP UI uses Groovy as a script language then you might take a look of it.


  • After defining your answers, you have to define how these will be served to the caller; SoapUI provides several strategies:
    • RANDOM – serve a random answer
    • SEQUENCE – iterate through the available answers
    • QUERY_MATCH/XPATH – set up a mapping for each answer based on some queried request value
    • SCRIPT – create a Groovy script to determine the answer The most interesting (and easiest to set up) is the Groovy Script. I have to admit that it took me some time to come up with the script in a programming language I did not know before, but Groovy has a steep learning curve.


Above is my example, as you can see I've created a mapping

def symbolMap = [
"S":"Success" ,
"F":"Invalid parameters Fault" ,
"L":"Invalid login"
]

And in the script I get the first letter of the "Password" field and I use it as a key for the MAP above.
The result , which is the name of the Response, is returned back and SoapUI returns the correct Response to the client.

 
def xmlHolder = new com.eviware.soapui.support.XmlHolder( mockRequest.requestContent )

// extract the parameters from the request def

def string = xmlHolder["//*[local-name()='Password']"]

def reqSymbol = string.substring(0,1)


// request by symbol - lookup the appropriate response

log.info "The requested symbol (by symbol)=" + reqSymbol

// if mapping not found: null will be returned

def response = symbolMap[reqSymbol]

return response

  • Last step for you is to run and test your Mock Service. You've got two options:
    • Start the SOAP UI mock service. This can be started by right clicking at the mock port type and then Start mock service.
    • Deploy as a war from the Project context menu.