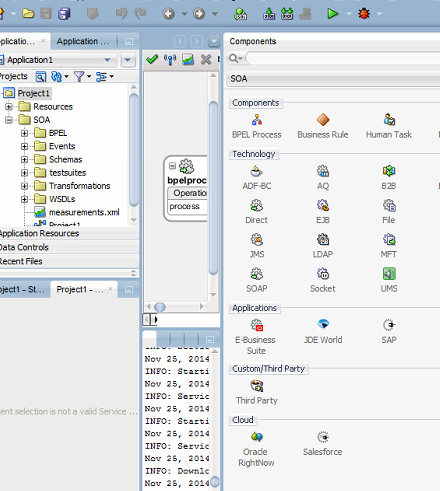
I've just roll out to a live environment, a SOA Integration project with Oracle Service Cloud Rightnow.
The customer needed to migrate from a in-house CRM to Oracle Service Cloud and with my company Infomentum we have helped them in taking this big step. Since that I have made lots of experience with OSC WebServices.
Here I just want to share the complex XSLT Transformation which we have implemented to communicate with the OSC WebServices, hopefully these can speed up any other SC integration projects.
There are 6 transformation in the ZIP package (we have implemented more):
| XSLT Name | SC Object | Out of the box Object? | Operation Type |
|---|---|---|---|
| xsltContact2Update | CONTACT | Yes | UPDATE |
| xsltOrganisationToUpdate | ORGANIZATION | Yes | UPDATE |
| xsltProgrammeToUpdate | CO.PROGRAMME | No | UPDATE |
| xsltProgrammeTypeToUpdate | CO.PROGRAMMETYPE | No | UPDATE |
| xsltCourseToUpdate2 | CO.COURSE | No | UPDATE |
| xsltSessionToUpdate | CO.SESSION | No | UPDATE |
In the XSLTs you'll find all the details about the TARGET columns (Oracle Service Cloud ones).
Here are some important concepts I want to highlight:
Below is an easy transformation used for the Programme CustomObject Update
<ns1:Update>
<ns1:RNObjects xsi:type="rng_v1_2:GenericObject">
<rnb_v1_2:ID id="{$InvokeGetProgramme_QueryCSV_OutputVariable.parameters/ns1:QueryCSVResponse/ns1:CSVTableSet/ns1:CSVTables/ns1:CSVTable/ns1:Rows/ns1:Row}"/>
<rng_v1_2:ObjectType>
<rng_v1_2:Namespace>CO</rng_v1_2:Namespace>
<rng_v1_2:TypeName>Programme</rng_v1_2:TypeName>
</rng_v1_2:ObjectType>
<rng_v1_2:GenericFields dataType="INTEGER" name="all_soa_totcodeid_int">
<rng_v1_2:DataValue>
<rng_v1_2:IntegerValue>
<xsl:value-of select="/ns0:programme/ns0:CodeID"/>
</rng_v1_2:IntegerValue>
</rng_v1_2:DataValue>
</rng_v1_2:GenericFields>
<rng_v1_2:GenericFields dataType="STRING" name="all_all_name_txt">
<rng_v1_2:DataValue>
<rng_v1_2:StringValue>
<xsl:value-of select="/ns0:programme/ns0:Description"/>
</rng_v1_2:StringValue>
</rng_v1_2:DataValue>
</rng_v1_2:GenericFields>
<rng_v1_2:GenericFields dataType="BOOLEAN" name="all_all_deleted_bol">
<rng_v1_2:DataValue>
<rng_v1_2:BooleanValue>
<xsl:value-of select="/ns0:programme/ns0:Deleted"/>
</rng_v1_2:BooleanValue>
</rng_v1_2:DataValue>
</rng_v1_2:GenericFields>
<rng_v1_2:GenericFields name="all_soa_modified_dt" dataType="DATETIME">
<rng_v1_2:DataValue>
<rng_v1_2:DateTimeValue>
<xsl:value-of select="ptutlGmt:getCurrentDateInGMT(string(/ns0:programme/ns0:SOA_ModifiedDate))"/>
</rng_v1_2:DateTimeValue>
</rng_v1_2:DataValue>
</rng_v1_2:GenericFields>
<rng_v1_2:GenericFields dataType="BOOLEAN" name="all_all_fromsoa_bol">
<rng_v1_2:DataValue>
<rng_v1_2:BooleanValue>1</rng_v1_2:BooleanValue>
</rng_v1_2:DataValue>
</rng_v1_2:GenericFields>
</ns1:RNObjects>
</ns1:Update>
Please download the transformation from here!
Also find here more information about this challenging project:
http://www.computing.co.uk/ctg/news/2433947/princes-trust-opts-for-oracle-for-digital-transformation
http://www.infomentum.com/uk/about-us/media-centre/news/princes-trust-golive
Let me know for any issues!!!
Here are some important concepts I want to highlight:
- SC Columns in the XSLT are sometimes out of the box column, in some other cases they are custom ones. In the XSLT the latter will be identified with the tag GenericFields.
<rng_v1_2:GenericFields dataType="OBJECT" name="C">
<rng_v1_2:DataValue>
<rng_v1_2:ObjectValue xsi:type="rng_v1_2:GenericObject">
<rng_v1_2:ObjectType>
<rng_v1_2:TypeName>ContactCustomFieldsc</rng_v1_2:TypeName>
</rng_v1_2:ObjectType>
<rng_v1_2:GenericFields dataType="BOOLEAN" name="yp_surveydeclined_mail_bol">
<rng_v1_2:DataValue>
<rng_v1_2:BooleanValue>
<xsl:value-of select="/ns0:contact/ns0:isMailOptionSur"/>
</rng_v1_2:BooleanValue>
</rng_v1_2:DataValue>
</rng_v1_2:GenericFields>
</rng_v1_2:ObjectValue>
</rng_v1_2:DataValue>
</rng_v1_2:GenericFields>
- Custom fields can be in the subPackage C or CO (you'll find this package in the attribute NAME of the GenericFields tag). The former is used for custom fields, the latter for custom object relationship fields. In this case the data type might be something like dataType="NAMED_ID", which means this is related to a complex object
<rng_v1_2:GenericFields dataType="OBJECT" name="CO">
<rng_v1_2:DataValue>
<rng_v1_2:ObjectValue xsi:type="rng_v1_2:GenericObject">
<rng_v1_2:ObjectType>
<rng_v1_2:TypeName>ContactCustomFieldsc</rng_v1_2:TypeName>
</rng_v1_2:ObjectType>
<rng_v1_2:GenericFields dataType="NAMED_ID" name="all_addr_region_lst">
<rng_v1_2:DataValue>
<rng_v1_2:NamedIDValue>
<rnb_v1_2:Name>
<xsl:value-of select="/ns0:contact/ns0:Region"/>
</rnb_v1_2:Name>
</rng_v1_2:NamedIDValue>
</rng_v1_2:DataValue>
</rng_v1_2:GenericFields>
</rng_v1_2:ObjectValue>
</rng_v1_2:DataValue>
</rng_v1_2:GenericFields>
- In order to blank any field in SC the client must pass the attribute xsi:nil="true" in the attribute tag or in the DataValue tag for the custom field.
<rng_v1_2:GenericFields dataType="OBJECT" name="CO">
<rng_v1_2:DataValue>
<rng_v1_2:ObjectValue xsi:type="rng_v1_2:GenericObject">
<rng_v1_2:ObjectType>
<rng_v1_2:TypeName>ContactCustomFieldsc</rng_v1_2:TypeName>
</rng_v1_2:ObjectType>
<rng_v1_2:GenericFields dataType="NAMED_ID" name="all_addr_region_lst">
<rng_v1_2:DataValue xsi:nil="true">
<rng_v1_2:NamedIDValue>
<rnb_v1_2:Name></rnb_v1_2:Name>
</rng_v1_2:NamedIDValue>
</rng_v1_2:DataValue>
</rng_v1_2:GenericFields>
</rng_v1_2:ObjectValue>
</rng_v1_2:DataValue>
</rng_v1_2:GenericFields>
- PhoneList and EmailList attribute needs to be managed via the ACTION (update, add, remove) attribute in the XSLT and via the TYPE ID (the ID of the Phone, since they might be multiple, like Mobile1, Work, Landline, etc, same applies to the Email)
<rno_v1_2:Phones>
<rno_v1_2:PhoneList action="update">
<rno_v1_2:Number>
<xsl:value-of select="/ns0:contact/ns0:TelWork"/>
</rno_v1_2:Number>
<rno_v1_2:PhoneType>
<rnb_v1_2:ID id="{0}"/>
</rno_v1_2:PhoneType>
</rno_v1_2:PhoneList>
<rno_v1_2:PhoneList action="remove">
<rno_v1_2:PhoneType>
<rnb_v1_2:ID id="{1}"/>
</rno_v1_2:PhoneType>
</rno_v1_2:PhoneList>
<rno_v1_2:PhoneList action="remove">
<rno_v1_2:PhoneType>
<rnb_v1_2:ID id="{2}"/>
</rno_v1_2:PhoneType>
</rno_v1_2:PhoneList>
Below is an easy transformation used for the Programme CustomObject Update
<ns1:Update>
<ns1:RNObjects xsi:type="rng_v1_2:GenericObject">
<rnb_v1_2:ID id="{$InvokeGetProgramme_QueryCSV_OutputVariable.parameters/ns1:QueryCSVResponse/ns1:CSVTableSet/ns1:CSVTables/ns1:CSVTable/ns1:Rows/ns1:Row}"/>
<rng_v1_2:ObjectType>
<rng_v1_2:Namespace>CO</rng_v1_2:Namespace>
<rng_v1_2:TypeName>Programme</rng_v1_2:TypeName>
</rng_v1_2:ObjectType>
<rng_v1_2:GenericFields dataType="INTEGER" name="all_soa_totcodeid_int">
<rng_v1_2:DataValue>
<rng_v1_2:IntegerValue>
<xsl:value-of select="/ns0:programme/ns0:CodeID"/>
</rng_v1_2:IntegerValue>
</rng_v1_2:DataValue>
</rng_v1_2:GenericFields>
<rng_v1_2:GenericFields dataType="STRING" name="all_all_name_txt">
<rng_v1_2:DataValue>
<rng_v1_2:StringValue>
<xsl:value-of select="/ns0:programme/ns0:Description"/>
</rng_v1_2:StringValue>
</rng_v1_2:DataValue>
</rng_v1_2:GenericFields>
<rng_v1_2:GenericFields dataType="BOOLEAN" name="all_all_deleted_bol">
<rng_v1_2:DataValue>
<rng_v1_2:BooleanValue>
<xsl:value-of select="/ns0:programme/ns0:Deleted"/>
</rng_v1_2:BooleanValue>
</rng_v1_2:DataValue>
</rng_v1_2:GenericFields>
<rng_v1_2:GenericFields name="all_soa_modified_dt" dataType="DATETIME">
<rng_v1_2:DataValue>
<rng_v1_2:DateTimeValue>
<xsl:value-of select="ptutlGmt:getCurrentDateInGMT(string(/ns0:programme/ns0:SOA_ModifiedDate))"/>
</rng_v1_2:DateTimeValue>
</rng_v1_2:DataValue>
</rng_v1_2:GenericFields>
<rng_v1_2:GenericFields dataType="BOOLEAN" name="all_all_fromsoa_bol">
<rng_v1_2:DataValue>
<rng_v1_2:BooleanValue>1</rng_v1_2:BooleanValue>
</rng_v1_2:DataValue>
</rng_v1_2:GenericFields>
</ns1:RNObjects>
</ns1:Update>
Please download the transformation from here!
Also find here more information about this challenging project:
http://www.computing.co.uk/ctg/news/2433947/princes-trust-opts-for-oracle-for-digital-transformation
http://www.infomentum.com/uk/about-us/media-centre/news/princes-trust-golive
Let me know for any issues!!!